
There is a profound, almost primal comfort in a steaming bowl of soup that has been crafted with patience and intention. Imagine, for a moment, a chilly evening where the wind rattles the windowpanes and the light begins to fade early. Inside your kitchen, the air is thick with the inviting aroma of sautéed onions and the earthy, woodsy scent of fresh thyme. As you stand over a heavy-bottomed pot, the rhythmic sound of a wooden spoon scraping against the base becomes a meditative melody. This is the magic of White Bean and Greens Soup—a dish that is far greater than the sum of its humble parts, transforming simple pantry staples into a masterpiece of texture and flavor.
At its heart, this soup is a celebration of balance. You have the creamy, buttery richness of the white beans, which provide a satisfying weight and a wealth of plant-based protein. This is contrasted beautifully by the vibrant, slightly bitter edge of sturdy greens like kale or Swiss chard, which wilt into the broth while retaining a pleasant bite. The base, a golden infusion of olive oil, aromatics, and vegetable stock, ties everything together with a savory depth that feels both nourishing and indulgent. It is the kind of meal that doesn’t just fill your stomach; it warms your spirit and makes you feel truly cared for, whether you are cooking for a family of four or enjoying a quiet moment of solitude.
What makes this particular recipe a cornerstone of the home cook’s repertoire is its incredible versatility and accessibility. It is a “pantry hero” in every sense of the word. Most of the ingredients are likely already sitting in your cupboard or crisper drawer, waiting to be called into action. Yet, despite its simplicity, the soup possesses an understated elegance. When finished with a bright squeeze of fresh lemon and a generous drizzle of high-quality extra virgin olive oil, it transforms from a rustic farmhouse meal into something worthy of a dinner party centerpiece. It invites you to slow down, to taste as you go, and to appreciate the nuances of heat, salt, and acidity.
As we embark on this culinary journey together, we will explore not just the “how” of the recipe, but the “why.” We will dive into the history of these ingredients, the science of building layers of flavor, and the small, artisanal touches that elevate a standard soup into a signature dish. Whether you are a seasoned chef or a novice picking up a knife for the first time, this guide is designed to empower you with the knowledge and confidence to create a bowl of soup that is perfectly tailored to your palate. So, tie on your apron, clear your counter, and let us begin the beautiful process of bringing this White Bean and Greens Soup to life.
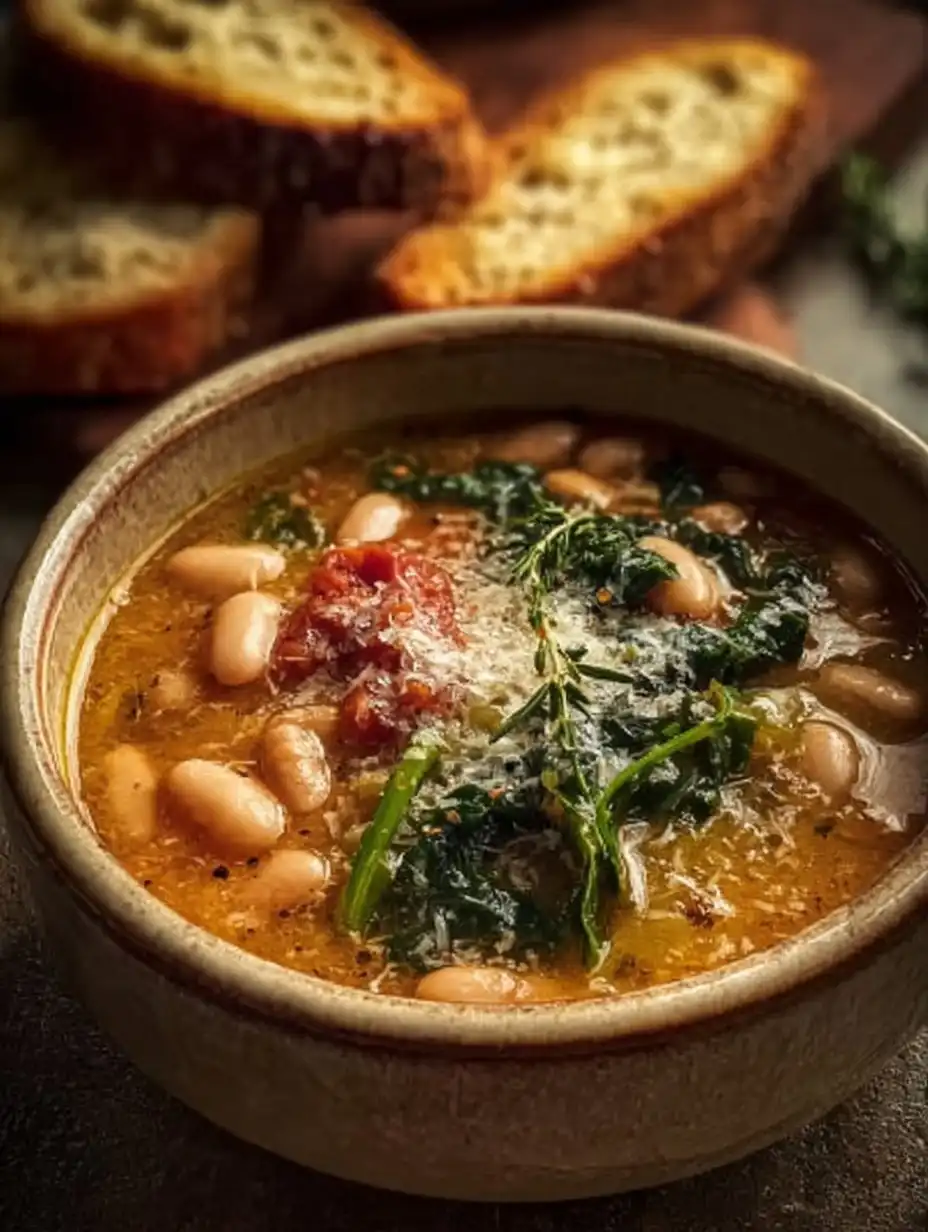
Why You Will Love This White Bean and Greens Soup
The Ultimate Nutritional Powerhouse
In an era where we are constantly bombarded with complicated health trends and expensive “superfoods,” it is easy to forget that some of the most nutritionally dense foods on the planet are also the most affordable. This soup is a shining example of “clean eating” at its finest. The white beans—whether you choose Cannellini, Great Northern, or Navy—are packed with dietary fiber, which aids in digestion and keeps you feeling full for hours. They are also an excellent source of plant-based protein, iron, and potassium, making this soup a complete meal in a bowl.
Then, we have the greens. Whether you opt for the iron-rich depth of kale, the mineral-heavy profile of collard greens, or the vitamin-packed silkiness of Swiss chard, you are infusing your body with a concentrated dose of antioxidants and essential nutrients. These greens provide the structural integrity the soup needs, ensuring that every spoonful offers a variety of textures. When you combine these with the anti-inflammatory properties of garlic and the beta-carotene in carrots, you aren’t just making dinner; you are crafting a tonic for your well-being.
Budget-Friendly and Sustainably Minded
One of the greatest joys of home cooking is the ability to create restaurant-quality meals for a fraction of the cost. This White Bean and Greens Soup is exceptionally kind to your wallet. Canned beans are one of the most cost-effective proteins available, and sturdy greens are often sold in large, inexpensive bunches that go a long way. This recipe also encourages a “zero-waste” philosophy. Have a stray celery stalk in the fridge? Toss it in. A parmesan rind hiding in the back of the cheese drawer? Let it simmer in the broth to add umami depth. This soup is a canvas for your kitchen’s leftovers, turning “scraps” into a gourmet experience.
A Masterclass in Flavor Layering
While the ingredient list is short, the flavor profile is complex. This is achieved through the process of layering. By starting with a foundation of high-quality olive oil and slowly softening the onions, you create a sweet, savory base. Adding the garlic and carrots at just the right moment ensures they release their essential oils without burning. The dried thyme provides a constant, herbal hum in the background, while the final addition of lemon juice acts as a “brightener,” cutting through the richness of the beans and lifting the entire dish. You will love this soup because it teaches you that you don’t need fifty ingredients to create a sophisticated flavor; you just need the right ones, treated with respect.
Adaptability for Every Season and Occasion
Though it is undeniably comforting in the winter, this soup is light enough to be enjoyed year-round. In the spring, you might swap the kale for tender baby spinach and add a handful of fresh peas. In the summer, a dollop of fresh basil pesto on top can transform it into a Mediterranean delight. It is also naturally vegetarian and can easily be made vegan, making it an inclusive choice for hosting guests with diverse dietary needs. It scales up beautifully for large gatherings and tastes even better the next day, making it the ultimate meal-prep champion.
Key Ingredients and Flavor Dynamics
The Foundation: Olive Oil and Aromatics
The choice of olive oil is the first decision that will influence the final outcome of your soup. For the initial sauté, a standard extra virgin olive oil works perfectly. However, the “finishing” oil—the drizzle you add just before serving—should be your best, most artisanal bottle. Look for something cold-pressed with a peppery or grassy finish; this raw oil will provide a luxurious mouthfeel and a fresh aroma that complements the cooked ingredients.
The aromatics—onion, garlic, and carrots—are known in French cooking as the mirepoix (though traditionally celery is included). In this recipe, the onion provides the foundational sweetness. Yellow onions are the standard choice for their balanced sugar content, but red onions can add a subtle sharpness, and leeks can provide a sophisticated, buttery undertone. Garlic is the soul of the dish. When minced finely, it melts into the broth, providing a pungent backbone that supports the other flavors. Carrots are listed as optional, but they are highly recommended for the visual pop of orange they provide and the way their natural sugars balance the earthy bitterness of the greens.
The Heart: White Beans
Not all white beans are created equal, and your choice will dictate the texture of your soup. Cannellini beans, also known as White Kidney beans, are the gold standard for Italian-style soups. They are large, creamy, and have a thin skin that almost dissolves, contributing to a thicker, heartier broth. Great Northern beans are slightly smaller and firmer, holding their shape well even after long simmering. If you prefer a more “brothy” soup with distinct bites of bean, these are an excellent choice. Navy beans are the smallest and quickest to break down, perfect if you want a naturally “creamy” soup without adding dairy. Regardless of the variety, rinsing canned beans is crucial to remove excess sodium and the metallic taste of the canning liquid.
The Structure: Sturdy Greens
The “greens” component of this soup is where you can truly express your culinary personality. Kale (specifically Lacinato or “Dino” kale) is a favorite for its rugged texture and deep color. It stands up well to the heat and doesn’t become “mushy.” Swiss Chard is another fantastic option; its leaves are silkier than kale, and if you use the rainbow variety, the colorful stems add a beautiful aesthetic. Collard Greens offer a more traditional, southern-soul feel, with a robust flavor that benefits from the simmering time. If you prefer a milder taste, Escarole is a classic Italian choice that provides a sophisticated, slightly bitter note that pairs exquisitely with white beans.
The Liquid Gold: Broth and Seasoning
The broth is the medium through which all flavors travel. A high-quality, low-sodium vegetable broth allows you to control the salt levels of your dish. If you have the time, making a quick stock from kitchen scraps (onion skins, carrot tops, parsley stems) will add a level of freshness that store-bought versions simply cannot match. If using water and bouillon, be mindful of the salt content, as bouillon can be quite potent. Thyme is the primary herb here, offering a minty, lemony, and earthy fragrance. Dried thyme is more concentrated, while fresh thyme adds a bright, floral top note. Finally, the lemon and pepper are the “adjusters.” Salt enhances, pepper adds a gentle heat, and lemon provides the acidity necessary to “wake up” the palate.
Step-by-Step Cooking Guide and Culinary Techniques
Cooking is an art, but it is also a series of logical steps that build upon one another. By following this detailed guide, you will master the techniques necessary to ensure your White Bean and Greens Soup is balanced, flavorful, and perfectly textured every single time.
Step 1: The Foundation of Flavor
Begin by placing your large pot—ideally a Dutch oven or a heavy-bottomed stockpot—over medium heat. Add the two tablespoons of olive oil and let it shimmer for a moment. This ensures the oil is hot enough to begin cooking the vegetables immediately upon contact. Add your diced onion and a generous pinch of salt. The salt here serves two purposes: it seasons the onion from the inside out and draws out moisture, allowing the onion to soften and become translucent without browning too quickly. Cook for 5–7 minutes. You are looking for the onions to become soft, sweet, and fragrant. If they begin to brown at the edges, turn the heat down slightly. This stage is about building a gentle, sweet base for your soup.
Step 2: Adding the Aromatics
Once the onions are soft, add your minced garlic and diced carrots. This is a critical timing moment. Garlic has a high sugar content and can burn easily, which would impart a bitter, unpleasant taste to the entire pot. By adding it now, you only need to cook it for 1–2 minutes. You’ll know it’s ready when the kitchen suddenly smells incredible—that unmistakable, mouthwatering aroma of toasted garlic. The carrots will also begin to release their color into the oil, giving it a faint golden hue. Stir frequently to ensure the garlic is distributed and doesn’t stick to the bottom of the pot.
Step 3: Integrating the Beans and Herbs
Add your drained and rinsed white beans to the pot, followed by the dried thyme (or fresh herbs if using). Stir everything together for about a minute. This “toasting” of the beans and herbs in the flavored oil is a subtle but important technique. It allows the beans to absorb some of the fat and aromatics before the liquid is added, and it “wakes up” the dried thyme, releasing its essential oils. If you want a creamier soup, you can take the back of your wooden spoon and smash a small handful of the beans against the side of the pot at this stage. The released starches will naturally thicken the broth later on.
Step 4: The Simmering Process
Pour in your 4–6 cups of vegetable broth. Start with 4 cups if you prefer a thick, stew-like consistency, or use all 6 if you want a lighter, more traditional soup. Bring the mixture to a gentle boil, then immediately reduce the heat to a low simmer. Cover the pot partially with a lid. Let the soup simmer for 10–15 minutes. This is where the “melding” happens. The flavors of the onion, garlic, thyme, and beans are dancing together, creating a cohesive and deep savory profile. This is also the perfect time to prep your greens if you haven’t already, removing any tough woody stems and chopping the leaves into bite-sized ribbons.
Step 5: The Green Transformation
Add your chopped sturdy greens to the pot. At first, it might look like too many greens, but don’t worry—they will wilt significantly as they hit the hot liquid. Stir them in and let the soup simmer for another 3–5 minutes. For kale and collards, 5 minutes is usually perfect to soften the fibers while maintaining a vibrant green color. For Swiss chard or escarole, 3 minutes might be enough. The goal is “al dente” greens—soft enough to eat easily, but with enough structure to provide a contrast to the creamy beans. Watch the color; you want a deep, lush green, not a dull, overcooked olive drab.
Step 6: The Finishing Touches
This is the most important step: the tasting. Turn off the heat. Take a spoonful of the broth (be careful, it’s hot!) and evaluate. Does it need more salt? Does it need a crack of black pepper? Now, add a squeeze of fresh lemon juice. Start with a quarter of a lemon, stir, and taste again. The acidity should brighten the flavors without making the soup taste “lemony.” Finally, ladle the soup into bowls. Drizzle each serving with a teaspoon of your best extra virgin olive oil and perhaps another pinch of fresh herbs or a sprinkle of red pepper flakes for heat. Serve immediately while the steam is still rising.
Variations, Make-Ahead Strategies, and Storage
Creative Variations to Explore
While the base recipe is spectacular, the beauty of a white bean soup is how easily it can be adapted to different culinary traditions. Here are a few ways to put a unique spin on the dish:
- The Tuscan “Ribollita” Style: To make this soup even heartier, add cubes of stale sourdough bread directly into the pot during the last 5 minutes of simmering. The bread will absorb the broth and break down, creating a thick, porridge-like consistency that is incredibly satisfying. Add a pinch of crushed red pepper flakes for a classic Italian kick.
- The Umami Bomb: If you aren’t strictly vegan, add a Parmesan cheese rind to the pot during Step 4. As it simmers, the rind releases a salty, savory depth that transforms the broth. Remove the rind before serving. You can also add a tablespoon of tomato paste during Step 2 for a richer, more robust color and flavor.
- The Grain-Enhanced Bowl: For extra texture and nutrition, stir in a cup of cooked farro, barley, or quinoa at the very end. This turns the soup into a “power bowl” that is perfect for those who need a high-energy meal.
- The Smoky Variation: Use smoked paprika or a drop of liquid smoke to give the soup a “ham bone” flavor without actually using meat. This pairs exceptionally well with collard greens and a side of cornbread.
The Art of the Side Dish
What you serve alongside your soup can elevate the entire dining experience. A thick slice of artisanal sourdough, toasted and rubbed with a raw garlic clove, is the classic companion. The crunch of the bread against the creaminess of the beans is a match made in heaven. Alternatively, a crusty baguette is perfect for mopping up every last drop of the savory broth. If you want something lighter, a fresh garden salad with a simple vinaigrette provides a crisp, cool contrast to the warm soup. For a touch of creaminess without dairy, a dollop of unsweetened cashew yogurt or a swirl of tahini can add a modern, nutty twist.
Make-Ahead and Meal Prepping
This soup is a meal-prepper’s dream because the flavors actually improve after a day or two in the refrigerator. As the soup sits, the beans continue to release starches, making the broth even richer, and the herbs have more time to infuse the liquid. If you are making this specifically for meal prep, you might consider undercooking the greens slightly in Step 5, as they will continue to soften when you reheat the soup later in the week.
To store, allow the soup to cool completely to room temperature. Transfer it to airtight glass containers. It will stay fresh in the refrigerator for up to 5 days. For longer storage, this soup freezes beautifully. Use freezer-safe bags or containers, leaving about an inch of “headspace” at the top to allow for expansion as the liquid freezes. It can be frozen for up to 3 months. To reheat, simply thaw overnight in the fridge and warm it gently on the stovetop over medium-low heat, adding a splash of water or broth if it has thickened too much.
Troubleshooting Common Issues
Even the simplest recipes can sometimes go awry. If your soup feels “flat,” it almost always needs more salt or more acid (lemon juice). If it feels too thin, take a potato masher or an immersion blender and give it two or three quick pulses—this will release starches from the beans and thicken the base instantly. If the greens are too bitter for your liking, a tiny pinch of sugar can help balance the flavor, or you can add a bit more olive oil to coat the palate and mellow the bitterness.

White Bean and Greens Soup
Ingredients
Method
- Heat oil in a large pot over medium heat. Add onion and a pinch of salt. Cook 5–7 minutes until soft.
- Add garlic and carrots; cook 1–2 minutes until fragrant.
- Add the drained beans and thyme. Stir to coat.
- Pour in the broth and bring to a simmer. Cook 10–15 minutes so flavors meld.
- Add chopped greens and simmer 3–5 minutes until wilted but still bright.
- Taste and season with salt, pepper, and a squeeze of lemon. Serve with a drizzle of olive oil.
Notes
🍲 More Cozy Homemade Soups to Try:
- Parmesan Tomato Cannellini Bean Soup – rich Italian cannellini beans simmered with crushed tomatoes and aged cheese
- Winter Minestrone – hearty Italian minestrone brimming with wholesome beans, pasta, and vegetables
(FAQs)
Can I use dried beans instead of canned?
Absolutely! Using dried beans is often more flavorful and cost-effective, though it requires more time. You will need about 1 cup of dried beans to replace the two 15-oz cans. Soak the beans overnight in plenty of water, then drain them. You will need to increase the simmering time in Step 4 to approximately 60–90 minutes, or until the beans are tender, before adding the greens. Make sure to keep an eye on the liquid levels, as dried beans will absorb more broth than canned ones.
What are the best greens to use if I don’t like kale?
If kale is too tough or bitter for you, Swiss chard is the best alternative. It has a much softer leaf and a milder, almost beet-like sweetness. If you want something even more delicate, baby spinach is a great choice, though you should stir it in at the very last second, as it wilts almost instantly. For a unique, peppery bite, you could even use arugula, though its flavor is quite distinct and will change the character of the soup.
Is this soup gluten-free?
Yes, as written, the recipe is naturally gluten-free. Just ensure that your vegetable broth or bouillon is certified gluten-free, as some brands use wheat-based thickening agents or yeast extracts that contain gluten. If you are serving it with bread, simply opt for a gluten-free loaf or serve the soup on its own—it is certainly hearty enough to stand alone!
How can I make the soup creamier without adding dairy?
The secret lies in the beans themselves. To achieve a velvety, creamy texture without cream or butter, take about one cup of the soup (including beans and broth) and blend it in a high-speed blender until completely smooth. Pour this puree back into the main pot and stir. You will be amazed at how this simple trick creates a rich, luxurious mouthfeel while keeping the recipe light and plant-based.
My soup is too salty! How do I fix it?
If you’ve accidentally over-salted your soup, don’t panic. One classic trick is to add a peeled, halved raw potato to the pot and simmer it for 10 minutes; the potato will absorb some of the excess salt (remember to remove it before serving). Alternatively, you can dilute the soup with a bit more water or unsalted broth, or increase the acidity with more lemon juice to distract the palate from the saltiness.
Can I make this in a slow cooker or Instant Pot?
Yes, this recipe adapts well to modern appliances. For a Slow Cooker: Sauté the aromatics in a pan first for the best flavor, then add everything except the greens and lemon to the slow cooker. Cook on Low for 6–8 hours (if using dried beans) or 3–4 hours (if using canned). Stir in the greens at the very end. For an Instant Pot: Use the sauté function for the aromatics, add the beans and broth, and cook on High Pressure for 30 minutes (dried beans) or 5 minutes (canned). Manually release the pressure and stir in the greens.
What can I use if I don’t have fresh lemons?
If you find yourself without a lemon, a teaspoon of apple cider vinegar or white wine vinegar can provide the necessary acidic lift. The goal is to provide a “sharp” note to balance the “round” flavors of the beans and oil. Even a small amount of pickling liquid from a jar of capers can work in a pinch, adding both acidity and a touch of saltiness.
By understanding these nuances and mastering these simple techniques, you are well on your way to creating a White Bean and Greens Soup that is not just a meal, but an experience. It is a testament to the power of home cooking—the ability to take basic ingredients and, through heat and heart, turn them into something truly extraordinary. Enjoy the process, savor the aromas, and most importantly, enjoy every nourishing spoonful.
White Bean and Greens Soup
Ingredients
Method
- Heat oil in a large pot over medium heat. Add onion and a pinch of salt. Cook 5–7 minutes until soft.
- Add garlic and carrots; cook 1–2 minutes until fragrant.
- Add the drained beans and thyme. Stir to coat.
- Pour in the broth and bring to a simmer. Cook 10–15 minutes so flavors meld.
- Add chopped greens and simmer 3–5 minutes until wilted but still bright.
- Taste and season with salt, pepper, and a squeeze of lemon. Serve with a drizzle of olive oil.


4 thoughts on “White Bean and Greens Soup”