
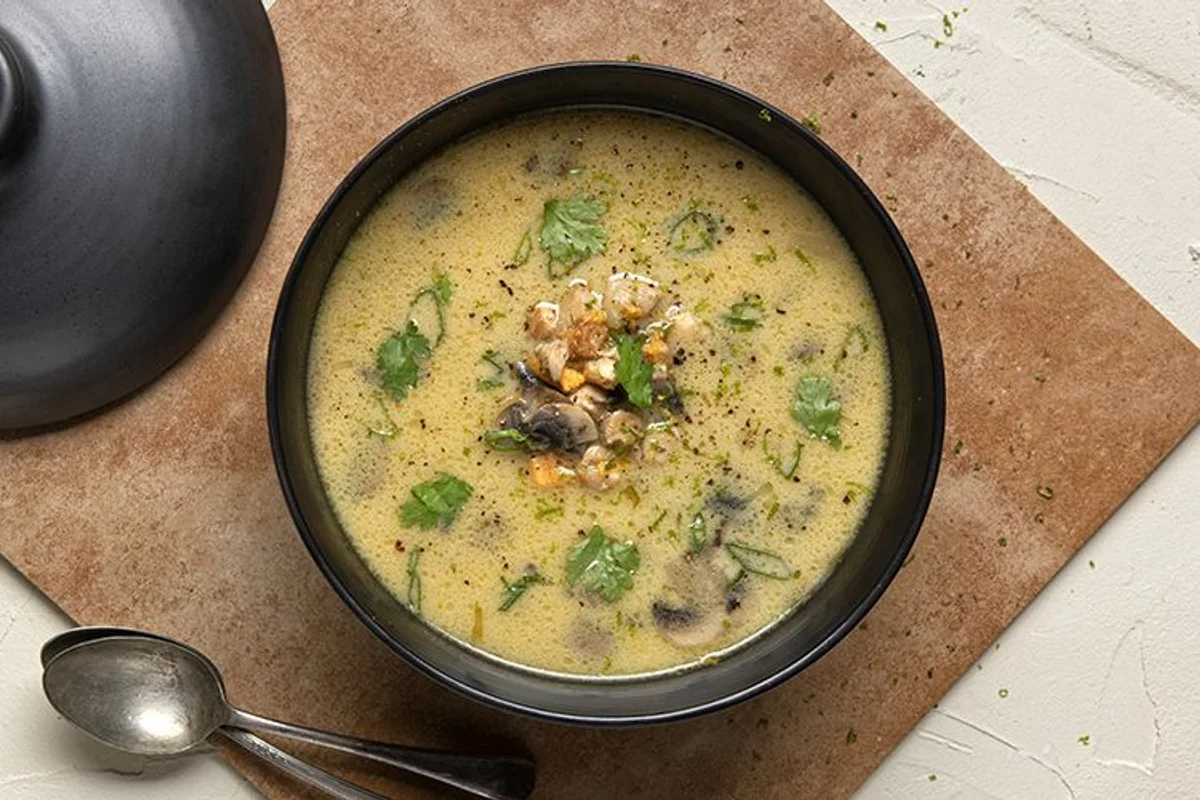
Imagine a cold, blustery evening where the wind rattles the windowpanes and a damp chill seems to settle into your very bones. In moments like these, the soul craves more than just sustenance; it seeks a culinary embrace. This is where the magic of White Chicken Chili enters the narrative. Unlike its robust, tomato-heavy cousin from the plains of Texas, this version is a sophisticated, creamy, and vibrantly flavored alternative that offers a different kind of warmth. It is a dish characterized by its ivory hues, flecks of emerald green chiles, and a velvety texture that feels like a luxury on the tongue. As the pot simmers on the stove, the air in your kitchen transforms, filling with the earthy perfume of toasted cumin and the bright, citrusy promise of fresh lime. It is a recipe that bridges the gap between a hearty stew and a delicate soup, providing a satisfying weight without the heaviness of traditional red chili.
The beauty of this dish lies in its layers. At first glance, it appears humble—a simple collection of beans, chicken, and broth. But as a master home-cooking educator, I can tell you that the secret is in the symphony of aromatics and the technique of building flavor. We begin with the gentle softening of onions and garlic, creating a sweet, savory foundation. We then introduce a trio of spices—cumin, oregano, and coriander—that provide a complex backdrop of woodsy, herbal, and citrus notes. The addition of mild green chiles adds a gentle hum of heat, a whisper rather than a shout, making it accessible to every palate while still remaining deeply interesting. It is a dish that invites creativity, allowing the home cook to play with textures and toppings to create a personalized masterpiece.
When you lift the lid of the heavy-bottomed pot, you are greeted by a sight that is as beautiful as it is appetizing. The white beans, partially mashed to create a naturally thick and luscious base, cradle tender shreds of chicken that have soaked up every ounce of seasoned broth. A final swirl of cream or coconut milk softens the edges of the spices, while a generous squeeze of lime juice cuts through the richness, waking up every single ingredient. This is not just a meal; it is an experience of comfort and culinary balance. It is the kind of recipe that becomes a family legend, the one requested for birthdays, game days, and quiet Sunday suppers alike. It represents the very best of home cooking: simple ingredients elevated through thoughtful preparation into something truly extraordinary.
As we embark on this culinary journey together, I want you to think of your kitchen as a studio and this recipe as your canvas. Whether you are a seasoned chef or a novice picking up a wooden spoon for the first time, the following guide is designed to empower you with the knowledge and confidence to execute this dish perfectly. We will explore the “why” behind every ingredient and the “how” behind every technique. By the time you serve your first bowl, you won’t just have a delicious dinner; you will have a deeper understanding of how flavors harmonize and how textures can be manipulated to create the ultimate comfort food. Let us begin the process of crafting your new favorite bowl of White Chicken Chili.

Why You Will Love This White Chicken Chili
A Refreshing Departure from Tradition
Most people, when they hear the word “chili,” immediately envision a dark, heavy bowl of ground beef, kidney beans, and a thick tomato base seasoned with chili powder. While that classic has its place in the American culinary canon, White Chicken Chili offers a refreshing and lighter alternative that doesn’t sacrifice an ounce of satisfaction. By swapping beef for chicken and tomatoes for a savory chicken broth base, the dish takes on a completely different personality. It is bright, aromatic, and sophisticated. It feels less like a heavy winter weight and more like a versatile meal that can be enjoyed year-round, from the deepest winter freeze to a breezy spring evening.
The Perfect Balance of Textures
One of the primary reasons this recipe stands out is its incredible mouthfeel. Through the simple yet effective technique of mashing a portion of the beans, we create a built-in thickening agent that gives the broth a “creamy” quality even before any dairy is added. You get the soft, buttery bite of the whole beans, the tender, fibrous strands of shredded chicken, and the silky smoothness of the enriched broth. This interplay of textures keeps the palate engaged and makes every spoonful a delight. It is a masterclass in how to use the ingredients themselves to improve the structural integrity of a soup.
Efficiency Meets Gourmet Flavor
In our modern, fast-paced lives, the ability to produce a gourmet-level meal in under forty-five minutes is a superpower. This recipe leans into smart shortcuts without compromising quality. By utilizing pre-cooked shredded chicken—whether it’s a leftover rotisserie chicken from the market or chicken you’ve poached during a weekend meal-prep session—you cut down the cooking time significantly. The use of canned beans and diced green chiles further streamlines the process. However, because we take the time to sauté the aromatics and toast the spices, the final result tastes as though it has been simmering on the back of the stove for hours. It is the ultimate “weeknight win” that feels like a “weekend treat.”
Nutritional Density and Customization
From a nutritional standpoint, this chili is a powerhouse. It is packed with lean protein from the chicken and a significant amount of fiber from the beans. The onions and garlic provide prebiotic benefits, while the green chiles offer a boost of Vitamin C. Furthermore, this recipe is a chameleon. If you are following a dairy-free lifestyle, the substitution of full-fat coconut milk works beautifully, adding a subtle tropical undertone that complements the lime and cilantro perfectly. It is naturally gluten-free (provided your broth is certified), making it a safe and delicious option for gatherings where dietary restrictions might be a concern. The topping station—where you can add avocado, cheese, or extra herbs—allows every diner to customize their bowl to their specific liking.
Key Ingredients and Flavor Dynamics
The Fat: Olive Oil
Every great dish starts with the right fat. Olive oil is chosen here for its high smoke point and its heart-healthy profile. When we heat the olive oil, we aren’t just preventing the onions from sticking; we are creating a medium that will later absorb the essential oils from the garlic and spices. I recommend using a high-quality extra virgin olive oil for a subtle peppery note, or a light olive oil if you prefer a more neutral start. The goal is to provide enough lubrication for the aromatics to soften and release their sugars without burning.
The Aromatics: Onion and Garlic
The yellow onion is the workhorse of the kitchen. When diced and sautéed, it loses its sharp, raw bite and transforms into a sweet, translucent base that provides the structural flavor for the chili. We cook it until it’s soft, which ensures that it melts into the background of the soup rather than providing a crunchy distraction. Garlic, the “aromatic king,” follows the onion. We mince it finely to maximize its surface area, allowing it to infuse the oil with its characteristic pungency. The brief thirty-second cook time for the garlic is crucial—it’s just enough to mellow the flavor without risking the bitterness that comes from over-browning.
The Spice Trilogy: Cumin, Oregano, and Coriander
This is where the soul of the White Chicken Chili resides. Ground cumin provides that quintessential “taco” or “chili” aroma—warm, earthy, and slightly nutty. It is the anchor of the spice profile. Dried oregano adds a Mediterranean herbal note that lightens the earthiness of the cumin. Finally, ground coriander—an optional but highly recommended addition—brings a faint floral and citrusy undertone that bridges the gap between the heavy spices and the fresh lime juice we add at the end. By toasting these spices in the oil before adding the liquid, we “bloom” them, a process that awakens their volatile oils and intensifies their flavor impact.
The Legumes: Great Northern or Cannellini Beans
The choice of bean is vital for the color and texture of this dish. Great Northern beans are a classic choice; they are medium-sized, hold their shape well during simmering, and have a mild, nutty flavor. Cannellini beans, also known as White Kidney beans, are slightly larger and creamier, offering a more luxurious texture when mashed. Both are excellent sources of plant-based protein and fiber. Rinsing and draining the beans is a key step—it removes the metallic taste of the canning liquid and excess sodium, giving you total control over the seasoning of your chili.
The Heat: Diced Green Chiles
Canned mild green chiles are a miracle ingredient. They provide the flavor of roasted peppers without the labor of roasting, peeling, and seeding them yourself. They offer a very mild heat that most children and spice-sensitive adults can handle easily. Their acidity and slight smokiness add a layer of complexity that prevents the creamy base from feeling one-dimensional. If you crave more heat, you can always swap these for diced jalapeños, but the mild chiles are what give this specific dish its approachable, comforting character.
The Liquid Base: Low-Sodium Chicken Broth
The broth is the vehicle for all the other flavors. Using a low-sodium version is a professional tip that allows you to control the saltiness of the final dish. As the soup simmers and reduces slightly, the salt concentration increases; starting with a low-sodium base prevents the chili from becoming an “over-salted” salt bomb. A high-quality broth or stock will provide a rich mouthfeel and a deep golden color that interacts beautifully with the white beans and green chiles.
The Protein: Shredded Chicken
The chicken provides the heartiness of the meal. Using pre-cooked shredded chicken is a brilliant time-saver. A rotisserie chicken from the grocery store is often seasoned to perfection and offers a mix of white and dark meat, which adds variety to the texture. If you prefer white meat, you can poach chicken breasts in water with a few peppercorns and a bay leaf until they are just tender, then shred them with two forks. The key is to add the chicken toward the end of the process so it stays moist and doesn’t become tough or overcooked during the simmering process.
The Creamy Finish: Dairy or Coconut Milk
The final addition of half-and-half, heavy cream, or full-fat coconut milk is what elevates this from a “bean soup” to a “white chili.” This ingredient provides the “white” in the name and creates a silky, opaque broth that feels incredibly indulgent. Heavy cream will give the richest result, while half-and-half offers a lighter touch. For those avoiding dairy, full-fat canned coconut milk is an incredible substitute. It adds a thickness and creaminess that mimics dairy perfectly, with a very subtle hint of sweetness that pairs exceptionally well with the lime and spices.
The Brightness: Lime and Cilantro
In the world of professional cooking, “brightness” refers to the addition of acid and fresh herbs at the end of the cooking process. The juice of a fresh lime is non-negotiable. It acts like a volume knob for flavor, making the cumin more vibrant and the chicken more savory. Fresh cilantro provides a burst of color and a citrusy, peppery finish that cuts through the creaminess. These final touches are what transform the dish from “good” to “restaurant-quality.”
Step-by-Step Cooking Guide and Culinary Techniques
Step 1: Laying the Foundation with Aromatics
Begin by selecting a large, heavy-bottomed pot, such as a Dutch oven. This type of cookware is ideal because it distributes heat evenly and retains it well, which is essential for a gentle simmer. Place the pot over medium heat and add two tablespoons of high-quality olive oil. Once the oil shimmers—indicating it is hot but not yet smoking—add your finely diced yellow onion. The sound you want to hear is a gentle sizzle, not a violent crackle. Use a wooden spoon to stir the onions, coating them in the oil. Sauté them for approximately 5 to 7 minutes. During this time, the onions will lose their opacity and turn a soft, translucent gold. This step is about patience; we are drawing out the natural sugars of the onion to create a sweet, savory base for our chili. If the onions begin to brown too quickly, turn the heat down slightly. We want softness, not caramelization.
Step 2: Introducing the Garlic
Once the onions are perfectly softened, create a small well in the center of the pot and add your minced garlic. Garlic is much more delicate than onion and can turn bitter and acrid if it burns. By adding it now, we ensure it has just enough time to release its aromatic oils. Cook the garlic for only about 30 seconds. You will know it is ready when the kitchen suddenly fills with that unmistakable, mouthwatering garlic scent. Stir it constantly to ensure even cooking and to prevent any small pieces from sticking to the bottom of the pot.
Step 3: Blooming the Spices
Now, it is time to add the cumin, dried oregano, and the optional ground coriander. Sprinkle these spices directly onto the sautéed onions and garlic. This technique is known as “blooming.” The heat from the oil and the aromatics will toast the spices, intensifying their flavors and aromas. Stir the mixture for about 1 minute. You will notice the color of the onions darkening slightly as they become coated in the spices, and the fragrance will become much more complex and earthy. This brief toasting period is a secret of professional chefs; it ensures that the spices are fully integrated into the fat, which will later carry those flavors into every drop of the broth.
Step 4: Building the Body
With your aromatic and spice base ready, it is time to add the bulk of the ingredients. Pour in the two cans of drained and rinsed beans, the small can of diced green chiles, and the four cups of chicken broth. The green chiles bring a beautiful flecked color to the pot, while the broth provides the liquid landscape. Increase the heat slightly to bring the mixture to a gentle simmer. A simmer is characterized by small, lazy bubbles breaking the surface, rather than a rolling boil. Once it reaches this state, reduce the heat to low-medium and let it cook for about 10 minutes. This period allows the beans to absorb the seasoned broth and the flavors of the chiles and spices to marry into a cohesive whole.
Step 5: The Thickening Secret
This is perhaps the most important technique in the entire recipe for achieving the perfect consistency. Using a slotted spoon or a small measuring cup, remove about 1 to 1.5 cups of the beans (along with a little bit of the liquid) from the pot and transfer them to a small bowl. Use a fork or a potato masher to crush the beans until they form a thick, mostly smooth paste. Stir this bean mash back into the pot. As the starch from the mashed beans integrates with the broth, it will naturally thicken the chili, giving it a rich, “creamy” body without the need for flour or cornstarch. This technique ensures that the chili feels substantial and hearty while remaining gluten-free and naturally flavorful.
Step 6: Integrating the Protein
Now that the base is thick and flavorful, add your two cups of cooked shredded chicken. Since the chicken is already cooked, this step is simply about warming it through and allowing it to soak up the seasoned liquid. Stir the chicken into the pot and let it simmer gently for another 5 to 7 minutes. You will see the chicken strands begin to separate and mingle with the whole beans. This is also a good time to check the consistency; if you prefer a thinner chili, you can add a splash more broth. If you want it thicker, let it simmer uncovered for a few extra minutes to allow some of the moisture to evaporate.
Step 7: The Final Flourish and Seasoning
Turn the heat down to low. It is crucial not to boil the chili once the dairy is added, as high heat can cause cream or coconut milk to separate. Stir in your half-and-half, heavy cream, or coconut milk. Watch as the color transforms into a beautiful, opaque ivory. Next, pour in the juice of one fresh lime. This hit of acidity is the “magic wand” that balances the richness of the dairy and the earthiness of the cumin. Now, perform the most important task of any cook: taste your creation. Add salt and freshly ground black pepper to your preference. Remember, the flavors will continue to develop as the chili sits. Finally, stir in a handful of fresh, chopped cilantro. Serve the chili hot, piled high with your favorite toppings like shredded Monterey Jack cheese, creamy avocado slices, and extra lime wedges for an added pop of brightness.
Variations, Make-Ahead Strategies, and Storage
Creative Variations for Every Palate
While the base recipe is a classic, the world of White Chicken Chili is vast and accommodating. For those who enjoy a bit of sweetness and extra texture, adding a cup of frozen or canned sweet corn (drained) during Step 4 provides a delightful crunch and a golden pop of color. If you want to increase the vegetable content, finely diced bell peppers (red or orange work well) can be sautéed along with the onions. For a nutritional boost, stir in a handful of chopped kale or baby spinach during the final simmering stage; the residual heat will wilt the greens perfectly without overcooking them.
For those looking for a vegetarian version, simply omit the chicken and replace the chicken broth with a high-quality vegetable broth. To maintain the heartiness, you can add a third can of beans (perhaps chickpeas for a different texture) or even some diced sweet potatoes, which add a lovely sweetness that complements the green chiles. If you prefer a smokier flavor profile, a teaspoon of smoked paprika or a tiny bit of chipotle chili in adobo sauce can be added during the spice-toasting phase, though this will slightly alter the “white” color of the chili.
The Art of the Make-Ahead Meal
White Chicken Chili is one of those rare dishes that actually tastes better the next day. As the chili sits in the refrigerator, the spices have more time to permeate the chicken and the beans, and the starches from the beans continue to thicken the broth. If you are planning a party or a busy week, you can easily make this chili 24 to 48 hours in advance. Simply follow the recipe up to Step 6 (before adding the dairy and lime juice), let it cool completely, and store it in the refrigerator. When you are ready to serve, reheat it gently on the stove over medium-low heat. Once it is hot, proceed with Step 7 by adding the cream, lime, and cilantro. This ensures the dairy stays fresh and the lime juice maintains its bright, acidic punch.
Storage and Freezing Guidelines
Proper storage is key to maintaining the quality of your leftovers. Store the chili in airtight containers in the refrigerator for up to 3 to 4 days. When reheating, you may find that the chili has thickened significantly as the beans have absorbed more liquid. Simply add a splash of water or chicken broth to loosen it back up to your desired consistency.
Can you freeze White Chicken Chili? The answer is a resounding yes, with one small caveat. If you plan to freeze the chili, it is best to do so before adding the dairy (cream or half-and-half). Dairy-based soups can sometimes take on a slightly grainy texture when thawed and reheated. Freeze the “base” chili in freezer-safe bags or containers for up to 3 months. To serve, thaw the chili in the refrigerator overnight, reheat it on the stove, and then add the fresh cream and lime juice just before serving. If you have already added the dairy and have leftovers you want to freeze, you still can—just be aware that you may need to stir it vigorously during reheating to help the texture smoothen out.
Serving Suggestions and Side Dishes
While a bowl of this chili is a complete meal on its own, the right accompaniments can elevate the dining experience. A thick slice of artisanal sourdough or a crusty baguette is the perfect tool for swiping up every last drop of the creamy broth. For a more traditional pairing, warm cornbread with a hint of honey offers a sweet contrast to the savory spices. If you are looking for something lighter, a fresh garden salad with a simple lemon-tahini dressing provides a crisp, cool counterpoint to the warm stew. Some home cooks also love serving a dollop of cooling herb yogurt or sour cream on top to provide an extra layer of tang and temperature contrast.

White Chicken Chili
Ingredients
Method
- Heat oil in a large pot over medium heat. Add the diced onion and sauté until soft, about 5–7 minutes.
- Add garlic and cook for 30 seconds until fragrant.
- Stir in cumin, oregano, and coriander. Toast the spices briefly to wake their flavors.
- Add the beans, green chiles, and chicken broth. Bring to a simmer and cook for 10 minutes to let flavors blend.
- Remove about 1 to 1 1/2 cups of beans and mash them until mostly smooth. Stir the mashed beans back into the pot to thicken the base.
- Add shredded chicken and simmer for 5–7 minutes until warmed through.
- Stir in cream or coconut milk and lime juice. Taste and season with salt and pepper. Finish with cilantro and desired toppings.
Notes
🍲 More Cozy Homemade Soups to Try:
- Chicken Poblano Soup – smoky roasted poblano peppers and tender shredded chicken in a creamy broth
- Chicken Enchilada Soup – bold Mexican-spiced chicken soup loaded with black beans and corn
(FAQs)
What if my chili is too thin?
If your chili feels more like a thin soup than a hearty chili, don’t worry—it’s an easy fix! The first step is to ensure you’ve thoroughly mashed the 1.5 cups of beans as directed in Step 5. If it’s still too thin, you can remove another half-cup of beans and mash them. Alternatively, you can let the chili simmer uncovered for an additional 10 to 15 minutes; this allows some of the liquid to evaporate, naturally concentrating the flavors and thickening the base. A final resort is to mix a teaspoon of cornstarch with a tablespoon of cold water to create a “slurry,” stir it into the simmering chili, and cook for another two minutes until thickened.
Can I use dried beans instead of canned?
Absolutely! Dried beans are often more economical and have a superior texture. However, they require more preparation. You will need to soak about 1 to 1.5 cups of dried Great Northern or Cannellini beans overnight, then simmer them in water or broth until tender (usually 1 to 1.5 hours) before you begin the chili recipe. Once the beans are cooked and tender, you can proceed with Step 1 of the recipe, using your home-cooked beans in place of the canned ones. One benefit of this method is that you can use the bean-cooking liquid as part of your broth for even more flavor and starchiness.
How do I make this dish spicier?
This recipe is designed to be mild and family-friendly, but it can easily be “cranked up” for heat-seekers. The easiest way is to swap the mild green chiles for canned diced jalapeños. You can also add a pinch of cayenne pepper or red chili flakes during the spice-toasting stage (Step 3). For a fresh heat, add finely diced raw jalapeños (with the seeds for maximum fire) as a topping to individual bowls. Another great way to add heat without changing the base flavor too much is to provide a bottle of your favorite green hot sauce (like a Cholula or a salsa verde) at the table.
Is there a substitute for the cream or coconut milk?
If you want to keep the dish lighter or are looking for a different pantry staple, you can use whole milk, though the result will be less rich. Some people use a dollop of Greek yogurt or sour cream stirred into the individual bowls rather than adding dairy to the whole pot; this provides a similar creaminess with an added tang. If you want a dairy-free option that isn’t coconut milk, cashew cream (made by blending soaked cashews with a little water) is an excellent, neutral-tasting thickener that provides a very similar mouthfeel to heavy cream.
Can I make this in a Slow Cooker or Instant Pot?
Yes, this recipe adapts beautifully to modern appliances. For a slow cooker: add the aromatics, spices, beans, chiles, broth, and raw chicken breasts to the pot. Cook on low for 6 to 7 hours or high for 3 to 4 hours. Remove the chicken, shred it, and return it to the pot. Mash some of the beans as directed, then stir in the cream, lime, and cilantro at the very end. For an Instant Pot: use the “Sauté” function for the onions, garlic, and spices. Add the beans, chiles, broth, and raw chicken. Seal and cook on “High Pressure” for 10 minutes, followed by a natural pressure release for 5 minutes. Shred the chicken, mash the beans, and finish with the cream and lime. These methods are great for when you want the chili to cook while you are away from the kitchen.
What is the best way to shred the chicken?
If you are using a rotisserie chicken, the meat will usually fall off the bone quite easily, and you can simply pull it apart with your fingers or a pair of forks. If you have poached chicken breasts specifically for this recipe, the “two-fork method” is classic: hold the chicken breast with one fork and use the other to pull away shreds. For a professional hack, if you have a stand mixer, you can place warm (not hot) cooked chicken breasts in the bowl with the paddle attachment and run it on low speed for about 30 seconds. It will perfectly shred the chicken in a fraction of the time!
My lime is very dry; how much juice do I really need?
A standard lime usually yields about 2 tablespoons of juice. If your lime is particularly small or dry, you may need a second one. The goal is to provide enough acidity to balance the fats. If you don’t have fresh limes, a tablespoon of bottled lime juice or even a teaspoon of white vinegar or apple cider vinegar can work in a pinch, though the fresh citrus flavor of a real lime is definitely the gold standard for this dish. Always start with a little, taste, and add more as needed.
White Chicken Chili
Ingredients
Method
- Heat oil in a large pot over medium heat. Add the diced onion and sauté until soft, about 5–7 minutes.
- Add garlic and cook for 30 seconds until fragrant.
- Stir in cumin, oregano, and coriander. Toast the spices briefly to wake their flavors.
- Add the beans, green chiles, and chicken broth. Bring to a simmer and cook for 10 minutes to let flavors blend.
- Remove about 1 to 1 1/2 cups of beans and mash them until mostly smooth. Stir the mashed beans back into the pot to thicken the base.
- Add shredded chicken and simmer for 5–7 minutes until warmed through.
- Stir in cream or coconut milk and lime juice. Taste and season with salt and pepper. Finish with cilantro and desired toppings.

2 thoughts on “White Chicken Chili”