Why Make Cannellini Bean Soup
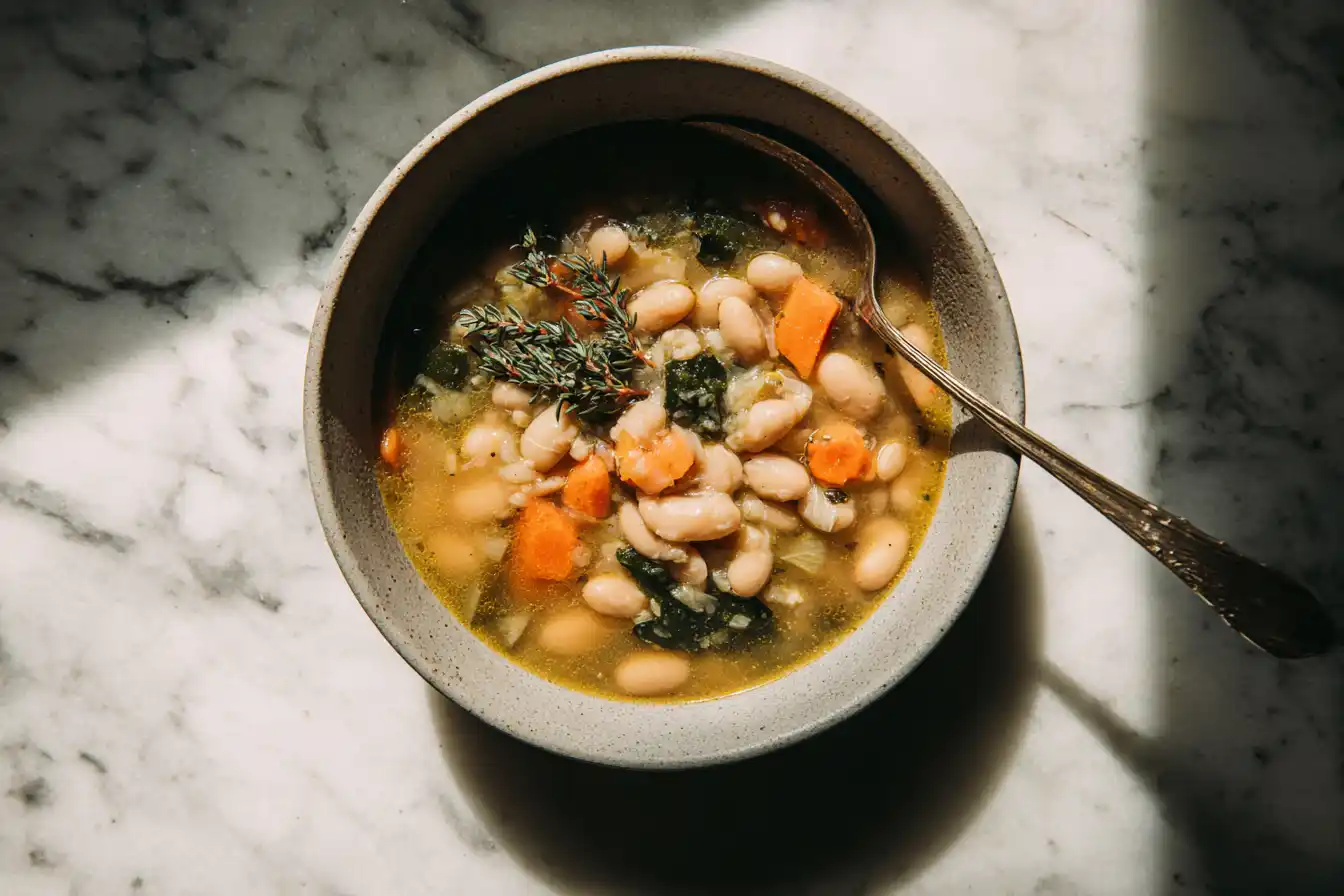
The decision to make Cannellini bean soup often begins with a look at the pantry, but the reasons to keep it in your regular rotation extend far beyond mere convenience. First and foremost, this soup is a nutritional powerhouse. Cannellini beans are an incredible source of plant-based protein and dietary fiber, which means a single bowl is remarkably satisfying and provides sustained energy throughout the day. They are also packed with essential minerals like iron, magnesium, and potassium, making this soup a functional food that supports heart health and digestion without ever sacrificing flavor. Beyond the health benefits, the versatility of Cannellini bean soup is unmatched. It serves as a blank canvas for the seasons. In the deep chill of winter, you might lean into the heartiness by adding extra root vegetables or a rind of Parmesan cheese to the simmering pot for a deep, savory undertone. In the spring, you can lighten the profile by folding in tender peas or a handful of wild ramps. It is a dish that adapts to what you have on hand, proving that you don’t need a specific list of groceries to create something spectacular. If you have a can of beans and an onion, you are already halfway to a gourmet meal. There is also a profound sense of heritage associated with this dish. White bean soups have been a staple of Mediterranean diets for centuries, providing a reliable source of nourishment for generations. When you make this soup, you are participating in a long lineage of home cooks who understood that the best flavors often come from the simplest preparations. This soup doesn’t need to shout to be heard; its quiet excellence lies in the balance of salt, acid, and earthiness. It is a reminder that in a world of complex flavor profiles and fast-paced trends, there is still immense value in the classics. Furthermore, making this soup is an exercise in budget-friendly gourmet cooking. In an era where grocery bills continue to rise, the humble bean remains one of the most cost-effective ingredients available. By utilizing dry or canned beans and common aromatic vegetables, you can feed a large family or meal-prep for a week for just a few dollars. This accessibility makes it a democratic dish—one that is just as at home on a farmhouse table as it is in a high-end bistro. It teaches us that flavor is not a product of price, but of technique and love. Finally, the sensory experience of making this soup is reason enough to put it on the stove. There is a specific sound—a gentle, rhythmic bubbling—that signals the flavors are melding together. There is the visual transformation of the spinach as it wilts into the hot liquid, turning a vibrant, emerald green against the creamy backdrop of the beans. And, of course, there is the aroma. The scent of garlic and rosemary drifting through the house creates an immediate sense of “home.” It is a dish that nourishes the spirit just as much as it nourishes the body.Why You’ll Love This Cannellini Bean Soup
You will love this Cannellini bean soup because it strikes the perfect balance between lightness and indulgence. Many creamy soups rely on heavy cream or flour-based thickeners, which can sometimes leave you feeling weighed down. This recipe, however, achieves its luxurious “creaminess” through the natural starches of the beans themselves. If you prefer an even thicker texture, you can simply mash a few of the beans against the side of the pot or use an immersion blender for a few pulses. This creates a silkiness that feels decadent while remaining entirely plant-forward and vibrant. Another reason this soup will become a favorite is its incredible “leftover potential.” Unlike many dishes that lose their luster after a night in the refrigerator, bean soups actually improve with time. As the soup sits, the beans continue to absorb the nuances of the garlic, herbs, and broth, leading to a deeper, more complex flavor the next day. This makes it the ultimate meal-prep solution. You can make a large pot on Sunday and enjoy a lunch that feels like a treat every single day of the work week. It also freezes beautifully, providing a “safety net” meal for those nights when you are too tired to cook. Texture lovers will find much to admire here. Every spoonful offers a variety of sensations: the tender-crisp bite of the carrots, the soft give of the beans, and the delicate silkiness of the wilted greens. By using fire-roasted tomatoes, you add a layer of subtle smokiness and a slight acidity that cuts through the richness of the beans, ensuring that every bite is dynamic. It is a soup that never feels monotonous. You can further customize the texture at the table by adding crunchy sourdough croutons, a sprinkle of toasted pine nuts, or a generous grating of sharp, salty cheese. This soup is also incredibly “forgiving.” If you accidentally add a little too much broth, you can simmer it down. If you don’t have spinach, you can use kale or Swiss chard. If you prefer a bit of heat, a pinch of red pepper flakes transforms the profile into something spicy and warming. This adaptability means that the recipe grows with you as a cook. It encourages you to trust your palate and make adjustments based on your personal preferences. It is a recipe that builds confidence in the kitchen because it is almost impossible to get wrong. Lastly, you will love the way this soup makes you feel. In a world of processed foods and quick fixes, there is something deeply grounding about eating a bowl of vegetables and legumes. It is “clean” eating in the truest sense—unprocessed, whole ingredients that leave you feeling satisfied rather than stuffed. It is the kind of food that provides a sense of well-being, a culinary hug that reminds you to take care of yourself. Whether you are serving it to a toddler who loves the soft beans or a guest with dietary restrictions, it is a dish that brings people together with a universal appeal.Ingredients and Substitutions
The beauty of this Cannellini bean soup lies in the quality of its components. While the list is simple, choosing the right ingredients and understanding how to substitute them can elevate the dish from a standard soup to a culinary masterpiece.- 2 tablespoons extra virgin olive oil or unsalted butter
- 1 large yellow onion, finely diced
- 3 medium carrots, peeled and sliced into uniform rounds
- 3 stalks celery, finely sliced
- 4 cloves fresh garlic, finely minced
- 6 cups low-sodium chicken bone broth or rich vegetable stock
- 1 can (15 ounces) diced fire-roasted tomatoes or cooked white cannellini beans, rinsed and drained
- 1 teaspoon dried Italian herb blend (oregano, basil, thyme)
- 1 teaspoon fine sea salt, plus more to taste
- 1/2 teaspoon freshly cracked black pepper
- 2 cups fresh baby spinach leaves or chopped flat-leaf kale
- 2 tablespoons freshly chopped parsley or grated Parmesan cheese, for serving
How to Make Cannellini Bean Soup
Creating a perfect soup is about layering flavors. It is not just about throwing everything into a pot and boiling it; it is about giving each ingredient the time and heat it needs to release its full potential. By following these steps with a focus on your senses, you will create a soup that tastes like it has been simmering for hours, even if it only took forty minutes.Step-by-Step Cooking Instructions
Step 1: Gather all ingredients, clean prep surfaces, and measure out your seasonings. Wash your fresh produce in cold water and slice all vegetables into uniform, bite-sized pieces so that every mouthful cooks evenly.
Expert Insight: This phase, often called “mise en place,” is the secret to stress-free cooking. When you have your onions, carrots, and celery neatly piled and your spices measured, you can focus entirely on the heat and the aromas in the pan. Use this time to notice the colors of your vegetables—the vibrant orange of the carrots and the pale green of the celery. Ensuring they are cut into uniform pieces isn’t just for aesthetics; it’s a functional requirement for even cooking. A large chunk of carrot will still be hard when a small piece has already turned to mush. Aim for half-inch pieces for the perfect balance.Step 2: Set your primary cooking vessel (heavy skillet, Dutch oven, or soup pot) over medium heat on your stovetop, or preheat your oven to the exact target baking temperature specified in the recipe. Add your cooking fat (olive oil or butter) and allow it to shimmer.
Expert Insight: The choice of pot matters. A heavy-bottomed Dutch oven is ideal because it distributes heat evenly and retains it well, preventing “hot spots” that can burn your vegetables. When you add the olive oil, watch it closely. As it heats, it will become thinner and begin to “shimmer” or form tiny ripples. This is your cue that the oil is ready. If it starts to smoke, it’s too hot; remove it from the heat for a moment to cool down. Starting with a properly heated pan ensures that your vegetables begin to soften immediately rather than soaking up cold oil.Step 3: Add your aromatic vegetables (diced onions, carrots, and celery) to the hot fat. Cook gently over medium heat for 5 to 7 minutes until tender, translucent, and sweet, stirring in the minced garlic during the final 60 seconds so it blooms without burning.
Expert Insight: This is where the foundation of flavor is built. You are looking for the onions to turn from opaque white to a soft, see-through translucency. Listen for a gentle sizzle—not a harsh fry. If the vegetables are browning too quickly, turn the heat down. The goal is to “sweat” them, releasing their natural sugars. When you add the garlic at the end, the scent will suddenly intensify. Garlic burns easily and becomes bitter, so that final 60 seconds is just enough time for it to become fragrant and “bloom” in the hot oil without turning dark brown.Step 4: Introduce your primary protein or core ingredients along with your dry herb and spice seasonings. Stir thoroughly for 2 to 3 minutes to coat every surface in the savory aromatic oil and allow the spices to toast lightly.
Expert Insight: In this recipe, your “core ingredients” are the Cannellini beans and the fire-roasted tomatoes. Adding them now, before the liquid, allows them to interface directly with the fat and the aromatics. As you stir, the dried herbs will hit the heat of the pan and release their essential oils, becoming much more potent. You’ll notice the color of the beans might darken slightly as they absorb the oil. This “toasting” phase adds a layer of complexity that you simply can’t get if you just dump everything into the broth at once.Step 5: Pour in your cooking broths, sauces, or fold in your blended dressings. Bring the mixture to a gentle, steady simmer over medium-low heat, stirring well to incorporate all the caramelized flavor from the bottom of the pan.
Expert Insight: As the broth hits the hot pan, use your wooden spoon to scrape up any browned bits stuck to the bottom. This is where the concentrated flavor lives. Instead of a violent boil, which can break the beans apart and make the broth cloudy, aim for a “gentle, steady simmer.” This means you should see small bubbles breaking the surface occasionally, like a slow heartbeat. This gentle heat allows the fibers in the carrots and celery to soften completely while the beans begin to release their starches into the broth.Step 6: Cover with a tight-fitting lid or transfer to the preheated oven. Cook for the recommended duration (40 minutes) until the food reaches safe internal temperature (165°F for poultry, or fork-tender for vegetables and soups).
Expert Insight: Covering the pot is crucial because it prevents too much liquid from evaporating, ensuring your soup doesn’t become overly salty or thick. While this is primarily a stovetop recipe, transferring a heavy pot to a 325°F oven is an old-school technique that provides a very gentle, surround-heat environment, which is excellent for developing flavor. After 40 minutes, test a carrot and a bean. The carrot should give way easily when pressed with a fork, and the bean should be creamy and soft. If you’ve added any leftover cooked chicken to the pot, this is the time to ensure it is heated through.Step 7: Remove the dish from heat and allow it to rest undisturbed for 5 minutes. Taste carefully to evaluate seasoning, adjust with a fresh squeeze of lemon juice, sea salt, or cracked pepper, and serve warm or chilled as intended with fresh herbs on top.
Expert Insight: Resting is perhaps the most underrated step in soup-making. It allows the temperature to stabilize and the flavors to “settle.” During this time, stir in your fresh spinach; the residual heat of the soup is more than enough to wilt it without overcooking it into a greyish mush. Now comes the most important part: the final seasoning. A soup can go from “good” to “extraordinary” with just a pinch more salt or a squeeze of lemon. The acid in the lemon juice acts as a highlighter, making all the other flavors stand out more clearly.Storage & Reheating
Properly storing your Cannellini bean soup ensures that you can enjoy its comforting flavors long after the initial cooking session. Because of the starch content in the beans, this soup tends to thicken significantly as it cools. When you go to store it, allow the soup to come to room temperature first. Placing a large pot of boiling hot soup directly into the refrigerator can raise the internal temperature of the fridge, potentially putting other perishable items at risk. Once cooled, transfer the soup into airtight glass or BPA-free plastic containers. It will stay fresh and delicious in the refrigerator for up to five days. If you find yourself with a large surplus, this soup is an excellent candidate for freezing. To freeze, leave about an inch of “headspace” at the top of your container, as the liquid will expand as it turns to ice. Alternatively, you can freeze the soup in heavy-duty freezer bags laid flat on a baking sheet; once frozen, these “soup bricks” can be stacked like books, saving an immense amount of freezer space. The soup will maintain its best quality for up to three months. When you are ready to eat it, the best method is to thaw it overnight in the refrigerator. Reheating the soup requires a gentle touch. On the stovetop, place the desired amount in a small pot over medium-low heat. Because the soup will have thickened, you will likely need to add a splash of water, additional broth, or even a little bit of tomato juice to loosen it back up to your preferred consistency. Stir frequently to ensure the beans don’t stick to the bottom of the pot. If you are in a hurry, the microwave works well too—just be sure to cover the bowl with a damp paper towel to prevent Splattering and stir halfway through the heating process. One of the joys of reheating bean soup is the opportunity to “re-fresh” the flavors. A day-old soup can be revitalized with a fresh crack of black pepper, a new sprinkle of parsley, or a fresh drizzle of high-quality olive oil. If the soup feels a bit dull after freezing, a tiny drop of balsamic vinegar or a new grating of Parmesan cheese can provide the “zing” it needs to taste as though it were just made. This soup is a resilient friend in the kitchen, always ready to provide a warm meal with very little effort.(FAQs)
Can I use dried beans instead of canned for this recipe? Absolutely. Using dried beans is often more flavorful and cost-effective. To do so, soak 1 cup of dried Cannellini beans overnight in plenty of water. Drain and rinse them, then add them to the pot in Step 4. You will need to increase the simmering time in Step 6 to about 60 to 90 minutes, or until the beans are completely tender. You may also need to add an extra 1-2 cups of broth, as dried beans will absorb more liquid than canned ones. How can I make the soup even creamier without adding dairy? The best trick for a creamy texture is to use the beans themselves. Before adding the spinach in Step 7, take about one or two cups of the soup (make sure to get plenty of beans) and blend it in a traditional blender or use an immersion blender directly in the pot for a few pulses. This creates a thick, starchy base that makes the entire soup feel velvety while keeping the recipe light and plant-based. What if my soup tastes a bit bland? Blandness in soup usually comes down to a lack of salt or acid. Start by adding a small pinch of salt, stirring, and tasting again. If the flavors still don’t “pop,” add a teaspoon of lemon juice or apple cider vinegar. The acidity cuts through the heaviness of the beans and brightens the entire dish. Additionally, ensure your dried herbs aren’t expired; old herbs lose their potency and won’t contribute much flavor. Is this soup gluten-free and vegan? As written, the soup is naturally gluten-free (just ensure your broth is certified gluten-free). To make it vegan, simply use olive oil instead of butter, choose a rich vegetable stock instead of chicken broth, and omit the Parmesan cheese or replace it with a sprinkle of nutritional yeast or a vegan cheese alternative. It is an incredibly inclusive dish that caters to almost any dietary requirement. Can I add meat to this soup? While this is a fantastic vegetarian meal, it also pairs well with protein. You can brown some Italian sausage or pancetta in Step 2 before adding the vegetables. Alternatively, you can stir in shredded rotisserie chicken or leftover turkey during the last 10 minutes of simmering. The beans provide a neutral, creamy backdrop that complements almost any savory protein. What are the best side dishes to serve with Cannellini bean soup? A crusty loaf of sourdough or a warm baguette is the classic choice for mopping up every last drop of broth. For a lighter pairing, a crisp green salad with a sharp lemon vinaigrette provides a nice contrast to the warm, earthy soup. If you want a more substantial meal, a side of roasted broccoli or sautéed garlic shrimp can turn a simple bowl of soup into a multi-course feast.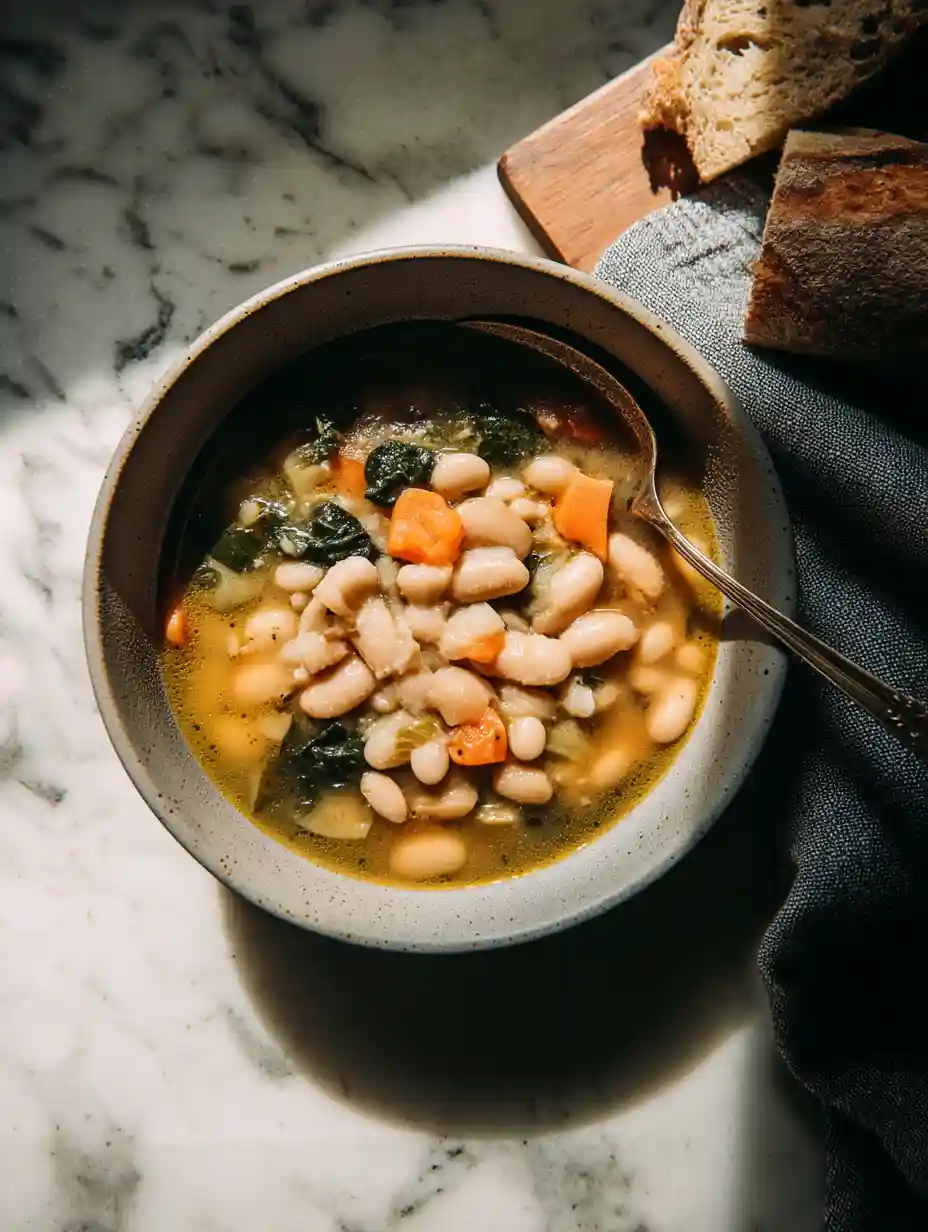
More Comforting Soups You’ll Love
If you enjoyed this recipe, be sure to explore these cozy favorites from our soup collection:
- Italian Sausage White Bean Soup – savory Italian sausage and cannellini beans cooked in a robust herb tomato broth.
- Hearty Tuscan White Bean Soup – classic Tuscan soup brimming with white beans, kale, and fragrant garlic.
Cannellini Bean Soup
Ingredients
Method
- Gather all ingredients, clean prep surfaces, and measure out your seasonings. Wash your fresh produce in cold water and slice all vegetables into uniform, bite-sized pieces so that every mouthful cooks evenly.
- Set your primary cooking vessel (heavy skillet, Dutch oven, or soup pot) over medium heat on your stovetop, or preheat your oven to the exact target baking temperature specified in the recipe. Add your cooking fat (olive oil or butter) and allow it to shimmer.
- Add your aromatic vegetables (diced onions, carrots, and celery) to the hot fat. Cook gently over medium heat for 5 to 7 minutes until tender, translucent, and sweet, stirring in the minced garlic during the final 60 seconds so it blooms without burning.
- Introduce your primary protein or core ingredients along with your dry herb and spice seasonings. Stir thoroughly for 2 to 3 minutes to coat every surface in the savory aromatic oil and allow the spices to toast lightly.
- Pour in your cooking broths, sauces, or fold in your blended dressings. Bring the mixture to a gentle, steady simmer over medium-low heat, stirring well to incorporate all the caramelized flavor from the bottom of the pan.
- Cover with a tight-fitting lid or transfer to the preheated oven. Cook for the recommended duration (40 minutes) until the food reaches safe internal temperature (165°F for poultry, or fork-tender for vegetables and soups).
- Remove the dish from heat and allow it to rest undisturbed for 5 minutes. Taste carefully to evaluate seasoning, adjust with a fresh squeeze of lemon juice, sea salt, or cracked pepper, and serve warm or chilled as intended with fresh herbs on top.